Keeping your gaming PC and accessories clean might not sound like the most exciting part of ownership, but it’s essential for long-term performance, longevity, and peace of mind. A clean PC ensures optimal airflow, prevents overheating, and protects your expensive components from damage. Dust buildup can clog your system, trap heat, and even cause hardware damage if left unchecked.
This guide walks through the step-by-step process of how to clean your PC by outlining the necessary tools and providing tips on the best ways to do it.
Why You Should Clean Your PC
Dust is the silent enemy of PC performance. When it builds up inside your case, it restricts airflow, traps heat, and causes your components, especially your CPU and GPU, to run hotter than they should. Over time, this can result in:
Overheating and hardware failure
Reduced airflow and performance throttling
Noisy fans are working overtime to compensate for the noise.
A shortened lifespan for your expensive components
The most important goal when cleaning a PC is to keep the airflow pathways clear and unobstructed. Fresh, cool air needs to enter, and hot air needs to exit. If dust filters are clogged or there is buildup on heatsinks, airflow is restricted, and your components will suffer as a result.
As the heat increases, it can cause:
Your CPU and GPU to throttle
Reduced clock speeds
In severe cases, the system might shut down under heavy load.
Regular cleaning is not just a task, it’s a responsibility that helps eliminate the risk of overheating and ensures everything stays cool and quiet. By being proactive in maintaining your PC, you’re ensuring its longevity and peak performance.
How Often Should You Clean Your PC?
You should perform a light dusting of your gaming PC every one to two weeks, surface cleaning about once a month, and internal deep cleaning every three to six months.
However, the frequency of cleaning a PC can vary based on several factors. You may need to clean your PC more frequently if:
You have pets
You live in a high-dust environment
You Smoke near your PC
You use an open or mesh-style case
You are gaming, rendering, or running it 24/7
A light dusting every few weeks or at least once every three to six months is ideal for most users. If your environment is particularly dusty or you’re a heavy user, consider doing internal cleaning monthly. Aim for deep cleanings every six months to a year, and at the very least, every couple of years to prevent performance loss or overheating.
Tools You’ll Need to Clean Your PC
Before you begin, you’ll need:
Microfiber cloths
Compressed air or an electric air duster
Isopropyl alcohol (90% or higher)
Soft or anti-static brush
Screwdriver (for opening your case)
Anti-static wrist strap (optional, but ideal)
These tools can help with cleaning a PC more effectively and safely. Always take precautions against static damage when handling internal components. An anti-static wrist strap is usually best, but if you don’t have one, simply touch your case or power supply housing regularly to discharge any static buildup.

Step-by-Step Guide on How to Clean Your PC
Cleaning a PC may seem intimidating, but with the right tools and a little patience, it’s a straightforward process that can significantly improve your system’s performance and longevity. Here is the step-by-step process on how to clean your PC.
1. Power Down and Unplug
Turn off your PC and unplug all the cables. For safety, always disconnect the power cord from the rear of the power supply.
Move your system to a well-ventilated area or open a nearby window to improve ventilation. This setup ensures that the dust you remove doesn’t settle back onto your components.
2. Clean the Exterior
Start by wiping down the case, monitor, keyboard, and mouse with a slightly damp microfiber cloth. The top and bottom of your case tend to gather the most dust, so give those areas extra attention. For any stubborn grime, a dab of isopropyl alcohol can help.
3. Open the Case
Use a screwdriver to remove the side panels and, if possible, the front panel. Be sure to prevent static discharge by either touching your case or using an anti-static before you touch any components.
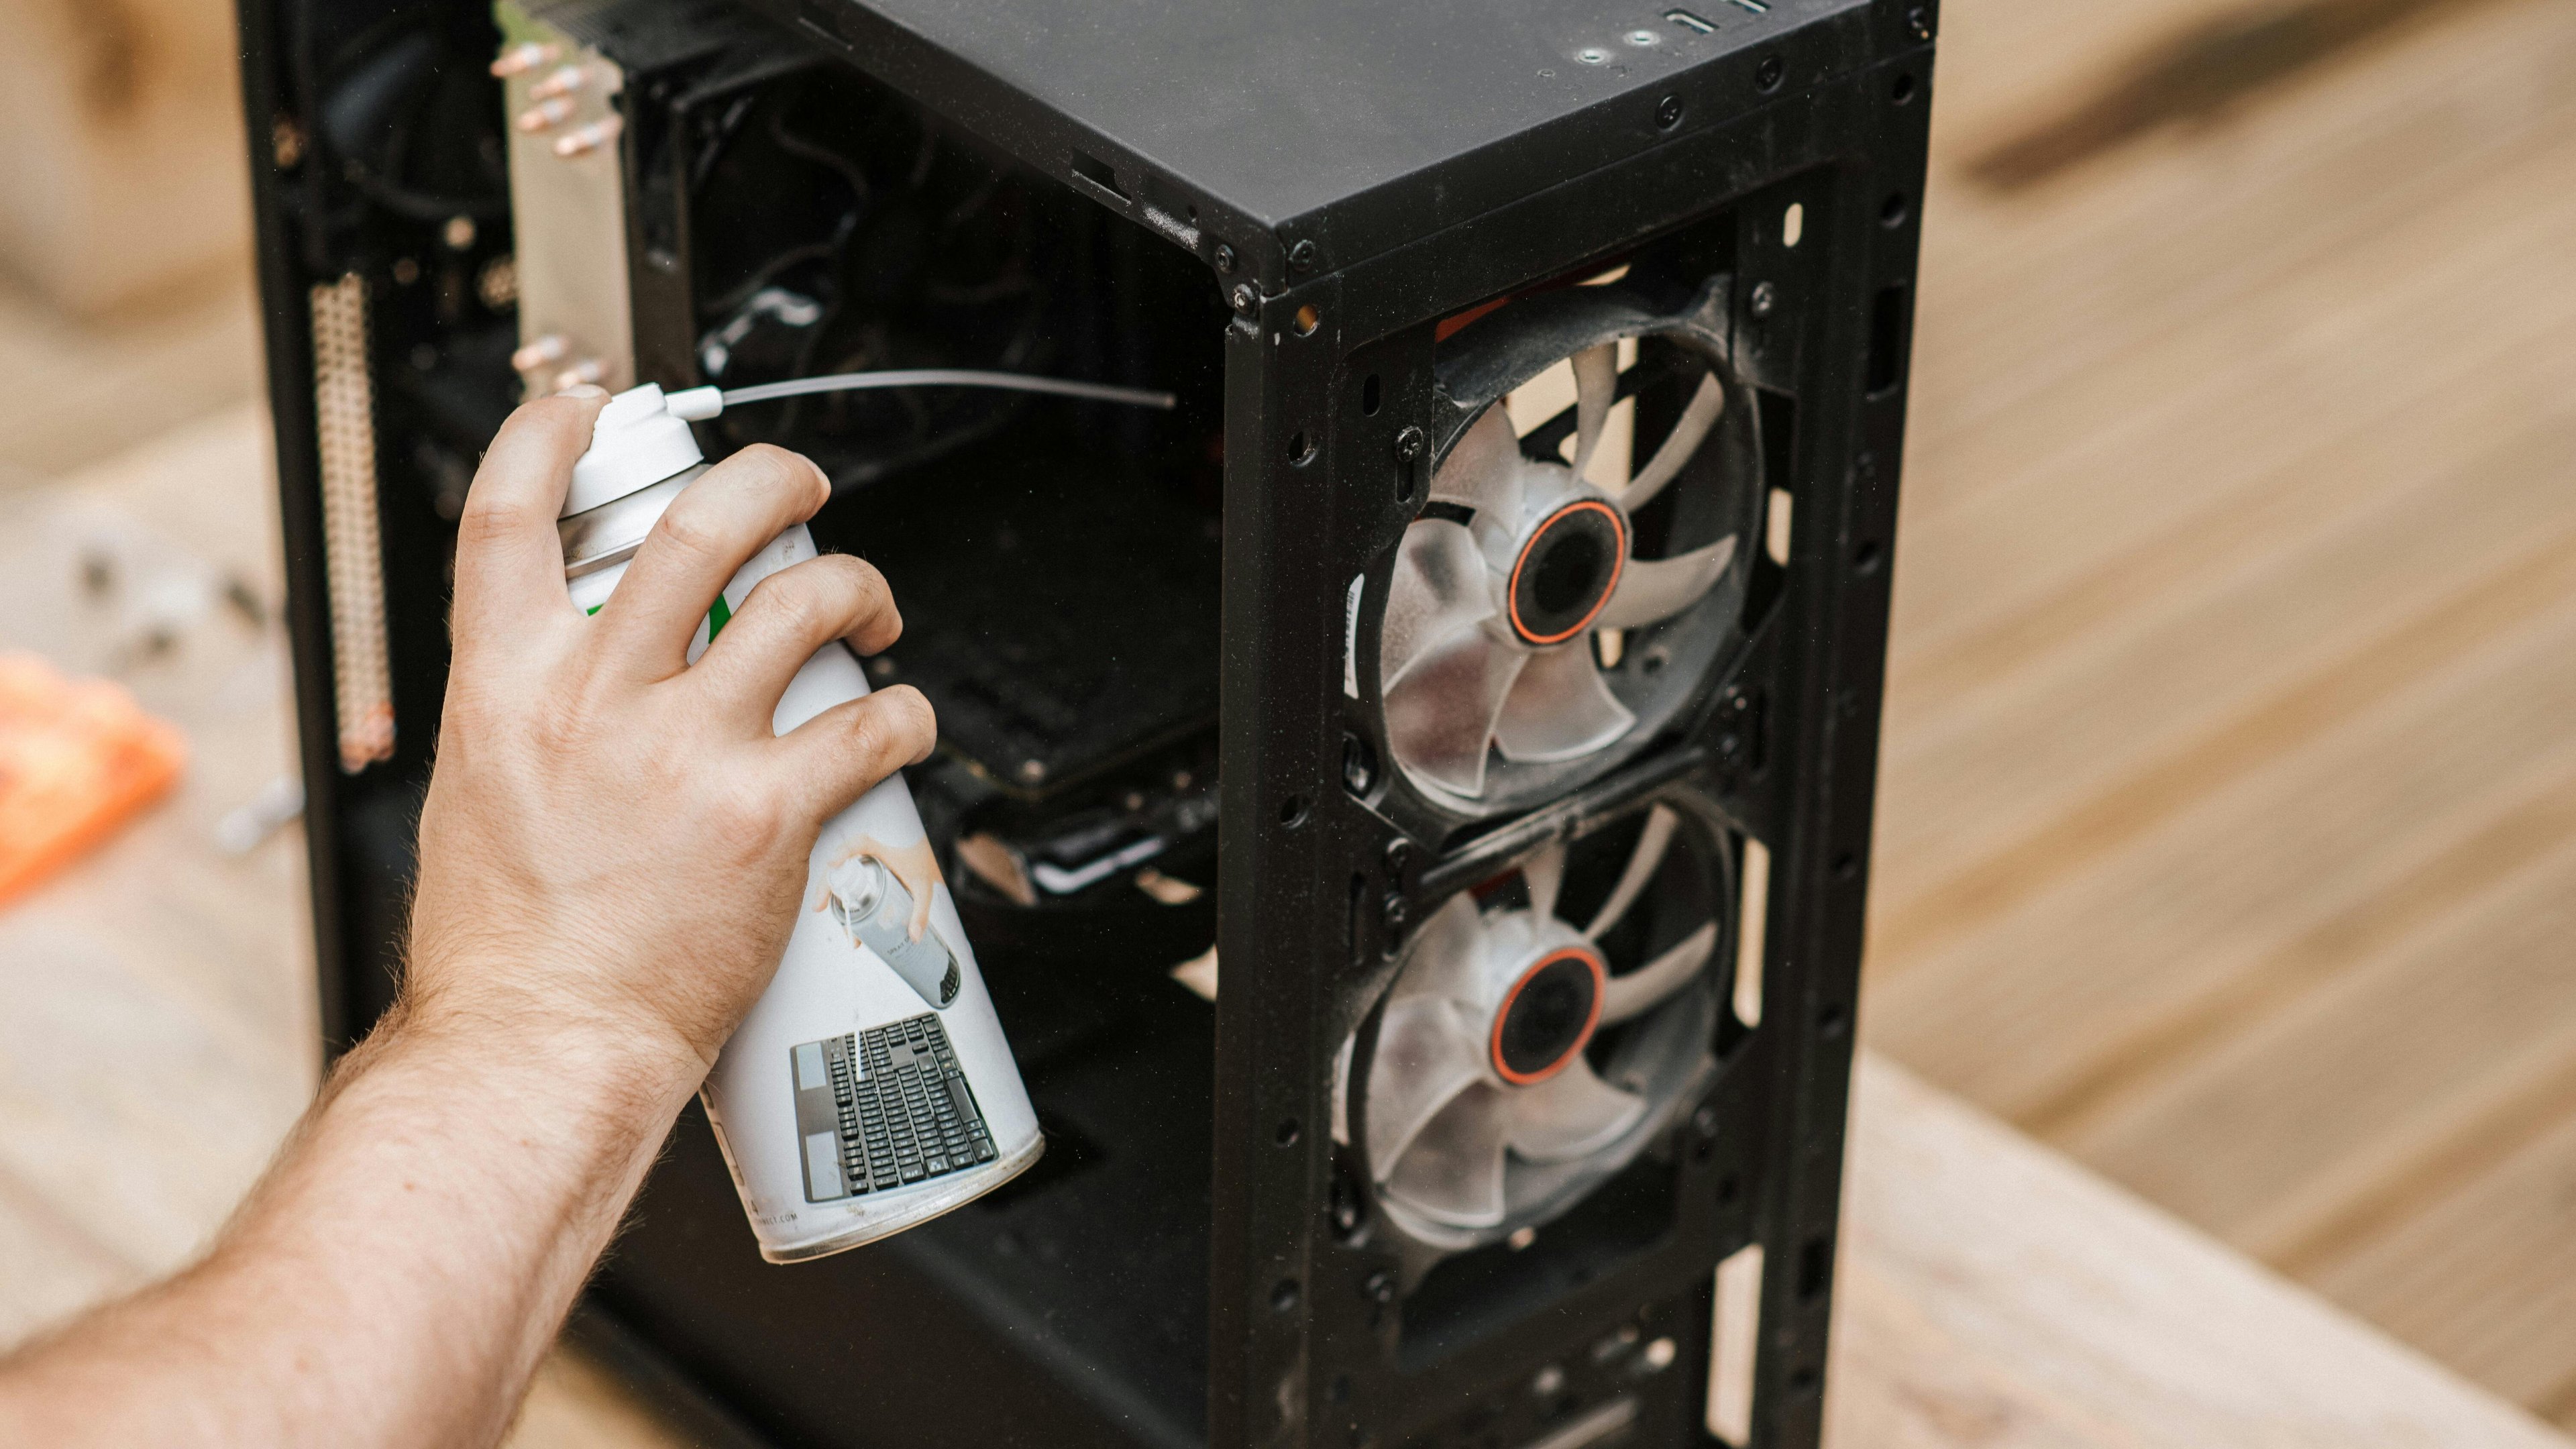
4. Dust Internal Components
One of the most important parts of maintaining your computer is knowing how to clean the inside of your PC. The best method is to use short bursts of compressed air to blow dust off fans, heatsinks, and filters.
Focus on:
Case fans
CPU fan and heatsink
GPU fans and backplate
Power supply fan grill
Motherboard and PCIe slots
Hold fans in place while cleaning a PC to prevent damage to the bearings.
If you’re doing a thorough clean and want your PC to look showroom-ready, you can fully disassemble it. Remove your components and lay them on a non-conductive surface. This step gives you access to every crevice, allowing for a truly deep clean. If you remove your CPU cooler, be sure to clean off the old thermal paste and reapply a fresh layer.
Use your cloth and a brush to gently clean dust buildup in tight spots. For sticky residue or fingerprints, lightly dampen a cotton swab with isopropyl alcohol. Also, avoid using a vacuum directly inside your case, as it can generate static electricity. Use it only to clean up dust on the floor after blowing it out of the system.
5. Clean or Replace Air Filters
Remove any dust filters on your intake or exhaust fans and either wash them or replace them to maintain consistent airflow and prevent future buildup.
6. Cable Management Touch-Up
Before reassembling your PC, take a moment to clean up your cables. Tidy cable routing looks better and improves airflow, helping to keep your PC cooler. You can also configure positive case pressure (more intake than exhaust) to reduce dust buildup over time.
Special Considerations
Although there is a basic step-by-step process on how to clean your PC, there are special instructions to keep in mind for specific technologies.
These special considerations include:
- Laptops: Laptops are harder to open, but you can still clean the keyboard, vents, and exterior regularly. For internal dust, use compressed air to blow through the vents.
- Liquid Cooling Systems: Wipe down tubing, radiator surfaces, and fans. Periodically check for leaks or discoloration in the coolant if using a custom loop.
- Mechanical Keyboards: Remove keycaps using a keycap puller, and clean the underside with compressed air and a soft brush. Wipe the keycaps down before replacing them.
Just as when you clean your PC, take your time when cleaning to avoid damaging anything.
Final Tips on How to Clean Your Computer
Cleaning a PC may not be glamorous, but it’s a necessary part of keeping it running smoothly and extending your components lifespan. Whether gaming, working, or browsing, regular maintenance helps ensure optimal performance and avoids unexpected shutdowns or costly repairs.
Here are some final tips to keep in mind while you clean your PC:
Keep your PC off the floor, where it’s more prone to dust
Use dust filters or an air purifier in your room
Set reminders to clean your PC regularly
Monitor CPU and GPU temperatures using software such as HWMonitor or MSI Afterburner.
Do not open or clean the inside of your power supply. Instead, use a can of compressed air to blast dust through the rear vent. The internal cleaning of a power supply should only be done by professionals due to the risk of shock.
If you need to clean your PC and are looking for the tools, check out iBUYPOWER’s selection of PC cleaning and maintenance supplies. We have excellent deals on our top-of-the-line gaming products, so visit our deals page and the iBUYPOWER coupons page to find the latest discounts on our gaming PCs and gear.
To stay updated on all things iBUYPOWER follow us on our socials
Instagram iBUYPOWER
Facebook iBUYPOWERPC
TikTok @iBUYPOWER
Reddit /r/iBUYPOWER
Discord iBUYPOWER